
Leaf mould is a humus rich invaluable compost that is a gardener’s dream. Made from decaying fallen leaves, it forms a dark brown crumbly compost that can be used as a mulch, soil conditioner, or mixed with other ingredients to make seed and potting compost. It is best made in the autumn when the leaves have fallen, preferably on a still dry day.
Most leaves are suitable but some will take longer to decay. Leaves from oak, beech, alder and hornbeam are ideal as they are thin and decay quickly. Other leaves such as sycamore, horse chestnut and sweet chestnut are thicker and slower to rot. These will need shredding to speed up their decay. Evergreen leaves such as holly or cherry laurel will take 2-3 years to decay and are perhaps best shredded and added to the traditional compost heap. Pine needles also take more time to rot and they are best used separately from other leaves as they make an acidic compost, suitable for Rhododendrons, Azaleas, Camellias etc.
When collecting the leaves from around the garden, if you are using a rake, rake in the direction the wind is blowing. Other ways to collect the leaves include making leaf boards out of rectangular boards to scoop up the leaves. Similar leaf grabs can be purchased. Leaf blowers and leaf vacuums can also be purchased. Some of these will shred the leaves for you or you can use a garden shredder. Another method of shredding the leaves is to mow over the leaves on the lawn with a rotary mower. This will also add small quantities of grass clippings which will add nutrients to the leaf mould.
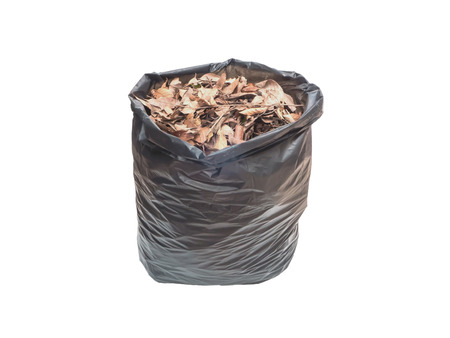
Making leaf mould in bin bags
This method is particularly suitable for smaller quantities of leaves. Leaves should be collected and put into black bags. When the bags are almost full, the leaves should be sprinkled with water, the bags should be shaken and tied. The sides and base of the bags should be pierced with a knife or garden fork to prevent the leaves from turning to slime. The bags should be placed in a shady spot in a sheltered area of the garden so the bags do not blow away, and ideally in an area where they are not an eyesore.
Making leaf mould in a bin
Leaf mould bins can be purchased or you can make your own with little difficulty. Simply hammer in four tree stakes in the shape of a square around one metre apart. Chicken wire can then be wrapped around the stakes to form a bin. The chicken wire should be attached to the stakes by hammering in galvanised staples. Wearing gloves, fold over any sharp edges. The bin should be situated in a sheltered area to stop the leaves blowing away. Moisten the leaves in dry spells. A larger heap like this will make decaying faster. Another way to speed up the process is to turn the leaves occasionally.
Using your leaf mould
After one year the leaf mould will still be recognisable as leaves. At this stage the leaf mould can be used as a valuable mulch to top your beds and borders. It can also be used as a lawn dressing to lock in moisture to the lawn and aid weed prevention. You will need to leave the leaves for two years before they can be used as a soil conditioner and to mix with other ingredients for seed and potting compost.
For any gardening supplies you may need visit our supplier directory
Mark Snelling
If you have enjoyed reading our blog post then why not fill in the form provided to allow us to send you our blog posts and newsletters by email.